... a little crafty place...


Wednesday, June 30, 2010

Wednesday! Crochet Tutorial I

Hello readers!!! thanks for visiting again... Oh! Goodness!!! The making of this video took me longer than I thought!!! I've never uploaded a video on Blogger before, or on YouTube. I had to edit it twice... but at the end it came out how I wanted, soooo, here I have what I promised :) My first crochet tutorial for beginners. Now, let me explain a few things before we start. On the video I tried to go really slow and repeated some steps so you could see better what I was doing. If the music bothers you, you can always play it mute :). I had to play some background music, because I live by a really busy street, so you'll only hear buses and cars. You can also pause it or rewind it, so you don't miss any step, that's what I like about video tutorials :).

On this tutorial I'll show you how to make the Slip Knot and the Chain which is abbreviated this way (Ch.) and I also show how the Right Side (RS) and the Wrong Side (WS) of the chain look like. I have this picture from a magazine that shows the difference between the RS and WS, just in case you can't see the difference on the video.


See? the RS has like V's close together, and the WS has vertical lines. You'll need to be able to know the difference for some projects and for the next tutorial as well.


I really hope you liked the video, I know it's of the best quality, I have to practice more... Well, it was the first time, I guess next time is going to be easier :) ... If you're having any trouble or you have questions about the tutorial email me to bluefarfallina@gmail.com or comment below, I'll be happy to help you.

Thanks for watching!!!
Now, grab your hook and start crocheting!!! :)

Chao, Chao!

Sunday, June 27, 2010

Pillow Update

Hello Hello!!!... How was your weekend?! I had a crochet weekend. I crocheted all day long yesterday, and part of Saturday. That's why the pillow it's almost finished, I'll take you through the "making of"...I still have to figure about what I'm going to use to close it. I took this pattern from a magazine, but this was a blanket. I followed the pattern, just as if I was making the blanket but I stopped at certain point to make a square... Here...


This is a picture of the magazine, I love this blanket :) It's colorful and light.


If I kept going and going, I would have ended up with a pretty blanket. Maybe one of my next projects? It's really easy, quick and fun to make. So, I stopped when I had a 6x6 (circles) square.


Then I made the little connectors, which closes the pattern a little more. I also like it without the connectors.


This is the part I had to come up with, the sides. I wanted a cylinder shaped pillow, so I added some more rows to the same pattern and ended up with this 5. Then I stitched one end of the square to the circle.


Here's a close-up of the side... Can you see it's the same pattern?. This is an example of how you can take a pattern and make it into something else, add some personal touches and you have something different and original. What if you make a blanket and a matching pillow, that's another idea!!! :)


Here's another view, I stuffed it with white t-shirts, hehe. I still have to make the white pillow. I want to be able to take it out, that way I can wash it, and maybe change the color, hmm... different backgrounds, do you like the idea??

This is what I have so far, I will definitely post some more pictures soon, in fact, I'm going to work on it right now :) ... Thanks for visiting!!!

Ciao, Ciao!!!

Friday, June 25, 2010

NEWS...

Good morning!!! Today is a good day!!! last night I finished the first part of my pillow WIP ^_^ I'll be posting an update on that, probably tonight (that, if I'm not crocheting like crazy so I can finally see my new "master piece" ;)... I also created my second crochet pattern, ok, ok, it is not THE pattern (you know, nothing fancy or super intricate), it's a flower, and something that looks like a dream catcher but it's not, :\ does it makes any sense?, it will when you see the pictures. It is so exciting because a year ago I didn't have a clue of how to crochet, just practicing you start understanding the stitches and how you can create new shapes and patterns and then you're capable of trying new things. My mom has asked me several times to teach her how to crochet, the thing is that she lives in the US and live in Panama, so either way I have to make a video or take pictures and post a tutorial so she can see how it's done. So, I have decided to make tutorials for beginners, not that I'm a PRO, but just for those that look at the stitches and think - that is so HARD!!! how do you do that!!!, trust me, it is NOT a hard thing to learn. That way i'll be helping my mamma and all of you who interested. Just sit back and relax, get your cup of hot coffee or tea, watch my tutorials and hopefully I will get you hooked ;).

So here's the plan. I'm going to try to post a new tutorial every wednesday, that way you'll have the weekend to practice and the others days of the week to ask any questions and send me some pictures of course :). It is exciting, isn't it? I remember when I was looking for tutorials, some were great but others were a little...mmm...I can't find the right word, but I didn't understand very well. That's why I want to try to take the best pictures and make the best videos. I really hope you enjoy them and you'll see that in no time you'll be crocheting.


Stay tuned!!!

Ciao, Ciao!

Thursday, June 24, 2010

Bake It Baby!!!

Hello again readers!!! today I have a little present for you!!!,but first, let me start with a little story. On monday, my boyfriend asked me to bake a pineapple cake. We tried it last year, and it was so good!!!! it is not made from scratch, is one of those Betty Crocker cake mix, fast and easy :) (I do love making cakes from scratch though) it was just too late, so I didn't want it to take too long. Any way, the instructions are written in english (US), therefore, the temperature was on Fahrenheit (F) and the oven has the little numbers in Celsius (C) don't you hate when that happens?. Well, it's really annoying to me, I'm not used to either C or F haha, so every time I want to make a recipe I have to go back to the computer and look for the temperature chart thingy. I know that a lot of you guys out there are either used to Celsius or to Fahrenheit, and you may have the same problem as me, so here's my little gift to you... I designed this little chart with the temperatures commonly used when baking (not necessarily sweet recipes). You can print it, plasticize it (you know, this hard plastic cover) and put it on your fridge, that way you have it at hand and you can used it with greasy, buttery, floury hands, then just wipe it clean. :)


Just right click the image, and save it to your computer. It is 3x4 in.

I hope you like the design. I might make some different ones ^_^. Please remember that it is for personal use only.

Enjoy!!!

Tuesday, June 22, 2010

Crocheted Pillow

Hello readers!!! thanks for stopping by again... I've been talking about a crocheted pillow right? Ok, here it is... I'm really excited about it. On saturday I was pretty much working on it all day long, watching some chick flicks while working ^_^. Oh! talking about movies, sunday night we went to see Toy Story 3, and I loved it!!!... Oh, goodness, I had watery eyes probably during the whole movie... It's a really fun and cute movie, totally recommend it :). Ok, back to the pillow. It is going to be one of those cylinder shaped pillows, I'm not sure if they have a specific name... it is mostly decorative, but I guess you can use it for your neck??? it depends. It has a lot of texture and color, I'm anxious to see how it looks like when it's finished... Let's take a look...


I'm using these 6 colors... plus the creamy one which is like the main color...


Here I'm making the colored centers of the circles. Tucked under my blanket, it doesn't get better than that ^_* ...


These are centers, they'll be like little flowers in the center of the pattern... I'll be posting a tutorial on how to make the circles, really easy and quick to make...


Now that I have a bunch, I'll start making the outer circle...


So far I've made about 40 of these, I'll have to see if that's enough for the size I want for the pillow...


Can you see a little flower that forms in the middle? cute right?... So, I just have to finish the rectangle with the circles, and I'll be showing you the process, little by little as I go... Stay tuned!!! you may not resist to make your own after you see how it turns out :)

Thanks for visiting...
xoxo...

Sunday, June 20, 2010

Lady Cactus Pin Cushion

Hello again!!! I want to show you my new pin cushion...I had to take a little break from crocheting... (yeah I need to show you my new crochet WIP) so I decided to make something simple and quick. I started looking at my old sketches for inspiration and I found this little cactus I drew sometime, somewhere... I can't remember, I just draw the ideas that suddenly come to mind so I don't forget, believe me they might not come back, that's why I have pages and pages all over the place and try to keep them together, while I get a new sketch book, I keep forgetting I need one. So anyway...


Here's my sketchy mess...


And my lady cactus!!! :)

I made the little pattern... and started hand sewing the pin cushion (I'm sure it would be better if I had a sewing machine... that's my next investment, for now, I'll just hand stitch, I still find it fun) . Well, here are some pictures of it... I love it!!!


Oh! yes, I didn't make the little pot, I thought it would be too tall, and I didn't want it falling on it's side.


I'm really happy with it... It's ready to help me hold my pins while I work :) ... I think I want to make more pin cushions, that might be my new hobby!!! On my next post I want to show you my new crocheted pillow... well is a work in progress, but I still want to share the process... Ok, I better get back to work or I'll never finish it... Thanks for stopping by...

Enjoy!!!

Thursday, June 17, 2010

Felt WIP Update

First of all let me tell you...I'm not very excited about this project :\ , I feel like something's missing... After moving the pieces around and around, cutting some others, adding more leaves I can't figure out what is missing. Any idea?... I love the theme though, It's cute :) Oh! and I've been looking for a frame for it too, I wanna have a piece of white cardboard around it, and then a white frame. I want it to be delicate, but I still think the piece is a little small to just frame it right on the edge of the felt... you know what I mean? I guess I'm going to have to wait until I have the frame to see if brings that little touche I feel is missing... Take a look...


Ok, I want to let you know (I know the sun is missing haha) Don't worry I didn't go blind stitching the leaves... Keep looking... Isn't it missing something? This is at the beginning, I cut everything, and lay it down, move it around until I like it.


Here is the bigger branch...I loved the little nest!!! and the dimension and texture on the leaves... You can see the stitching on the following pictures, I made some curly things to make it look like wood...


A cloud close up... I really like this picture, the cloud looks soft and fluffy...


This is the final result, I just thought I could have some flowers around somewhere... Hmmm, that could be a good idea... So, I'm not gonna call this WIP a finished project, I would make some changes, well, not changes I would add some other elements :) ... I think I'm liking what's on my head right now, I'm gonna go to bed now, and maybe tomorrow I'll show you what I made...

Thanks for stopping by... Enjoy...


New Goodies!!!

Hello again!! Today I'm excited because yesterday I bought some yarn!!! you know that feeling right? when you have some new goodies to work with, you don't even know where to start. I also got buttons, beautiful big buttons, I'm not sure what I'm going to use them for, but we'll see, something will come up. The idea of going back to the store and getting some more is really in my head right now, they have every color and size. Let's look at the pictures!!!


I don't think the colors show well on the pictures :\ These are not the best quality yarns, it is really hard to find yarn here in Panama, but they are soft and I believe polyester? I don't know, the label was written in Chinese :\. But they feel good though, I guess the crocheting/knitting world is not so big here. But I really liked these colors. They are kind of opaque, not so bright... that's why I got the pink and the light yellow, to trow some color to the bunch and make something pretty with it :) so stay tuned for new projects and tutorials!


These are my new buttons!!! I love the light colors and the combination. These are about 1" (1 inch) in diameter. Love them, love them...


Look at all the colors I got, they were on a basket, they had them separated in little bags with 5 buttons each, I guess these are the ones they don't sell and then they sell 5 for .99 cents... A good deal or what? and see? I almost got every color con the color wheel...


Here are the bigger ones, these were .40 cents for a baggie of 4 buttons!!! The size of each is about 1 1/8", and the purple here is way brighter in person (ha ha). The rainy season is here so the sky is mostly gray these days, and as a result, I can't take good pictures (and the flash would make things too bright!) you can tell I'm not the best photographer. Got any tips? :)


Last but not least, these little hot pink buttons. I paid .40 cents for 10 little buttons, these are maybe a 1/4".

So, do you want to know how much I spent for all of this? including yarn! $8.82... Isn't it a amazing???... I really want to go back. With this want to make a new bag for me! and maybe a trow pillow, with little buttons and some crocheted flowers. Any idea? I want to work on a new bag pattern. Phew! so many ideas running through my head right know. I better go and start sketching before they go away and vanish... Thanks again for visiting!!!

Enjoy!

Monday, June 14, 2010

Packing beads...

Hello!!! I haven't post the Update for the felt WIP :\ I've been packing all day long after days and days of procrastination. I really don't like packing, on my short 25 years of life (the truth is that I feel so old, this year I turn 26 and just thinking that in 4 years I'll be 30 makes me wanna hit the break and be 25 for a little longer hehe) this is the 19th time I move, that's why I don't like it, I'm tired of it, ok, that's another post.

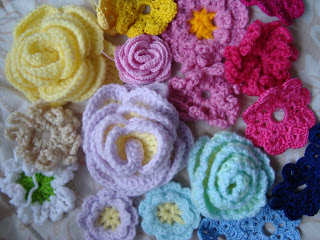
Today I started packing my crafts goodies :( I had to decide what to keep out of the box so I can at least have a piece of yarn and make a little crochet flower (I'm exaggerating) or something to satisfy my crochet/craft craving. Until I got to my beads boxes, scary!!!... I have those plastic boxes that IF! for any reason you flip the box upside down you'll have a colorful rainbow of mixed beads (DISASTER!).

Remember I told you I've been making jewelry with beads since I was little, ok about 10 years or so we were moving, and I decided that instead of taking, I don't know maybe 12 to 15 little match boxes and baggies (where I kept some of my smaller beads) I'll just put them all together in a plastic container, NOT SO SMART!. After we got to our new home I found the little colorful plastic container, I said, no problem! whenever I want to work with these, I'll put some beads on a big plate and I can pick the colors I want, easy!. It didn't work, grrrr, every time I was beading it took me longer to find the bead I wanted than to make the entire bracelet. So I did the tedious task of separating them!!! Yeap every single one, every color, that's why I really DON'T want my beads to mix and make me go to that horrible hours of painful picking-beads-almost-blinding moment. After I remembered this, I said hmmm, this time, some other people are going to take the boxes for us, and I know, they're not gonna be careful enough to not turn the boxes upside down, even if you draw a BIG RED arrow pointing UP!. I was going to take each color and make little bags and throw them on a box, it was gonna take me forever, so my boyfriend gave this idea!

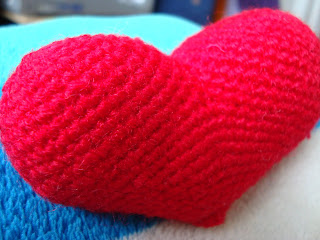
Grab a cotton ball and cover each space! :) I would never think of that... maybe it's just the way to do it, but I thought it was smart. So I grabbed a bunch of cotton I used once to shape an amiguruni and started "protecting" my beads :).


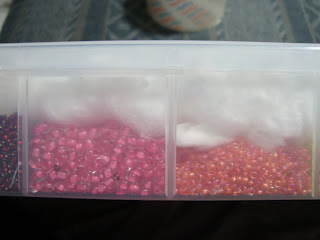
This is one of my boxes, see those uneven dividers?, I made them out of card stock, just so I could have more spaces and store more beads, the original spaces where too big for the amount of beads they sell so I was really wasting space there.


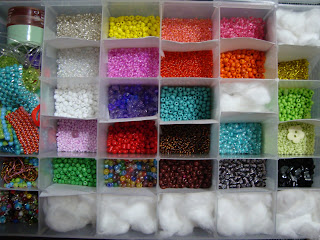
Here I started to put the cotton balls in place, do you think it is too much? what 'til you see the last picture.
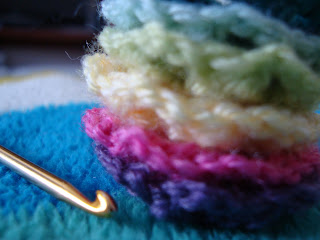

A closer look...


This is the result!!! Trust me it is NOT enough!!! My precious beads would be nice and covered so they have no were to go... I can always use this cotton to remove my nail polish right? ;)


Here a side shot, and see?? They are not going anywhere!!!

After I closed the box I taped the edge so it would not, by any change, open!!! :)

Ok, this is it for tonight. My back hurts so bad I just want to lay down and dream of my little beads resting without moving :). I promise I'll post my WIP update tomorrow. I would love to know other ideas for beads and small craft material storage, let me know if you have some tips you can share :)

Thanks for visiting!!!

Enjoy!


Sunday, June 13, 2010

A little WIP

Hello again!!! I'm writing this post while watching the game Germany vs. Australia, just so you know, I'm not a big soccer fan, but I like to watch the World Cup because EVERYBODY talks about it and all this things happen, they hit each other, they fall, they dance, so I kinda get into the game and sort of like it. Does it makes any sense? I don't know but this is a good game today.


Ok, let's get to crafty business now, I'm so excited about my new felt project!!! here's a little sneak peak...


Here I'm brain-storming I'm not really sure what I want to do, but I like the leaves. (Germany just scored and my neighbors are going crazy hehe)...


Stitching, stitching, stitching ....


Here's one branch finished! I really liked how the leaves came out, it was a little tricky to sew them together because they're tiny pieces, I would say that each leaf is about 2/8" mmm, almost a centimeter long :\ ... I'll be working on it this afternoon and post an update post tomorrow... :) Thanks again for visiting :)


Enjoy!!!

Friday, June 11, 2010

Felt... a colorful, easy, pretty little thing

Hello Again!!! I want to show you more of my felt finished projects. I love working with felt, is easy to cut, easy to sew, and there are many colors you can mix. It can be almost like drawing, you draw something that is in your mind, then cut the felt, and sew the pieces together, as easy as that. I'll post some more free patterns to help you get started and to give you a starting point.

I keep the sheets folded in half, so they won't wrinkle. The smaller pieces, I keep in a bag, usually they're so small that they wouldn't fold, I try to use as much as I can.
Oh! This picture is horrible! :\ but I wanted to show you how I did this piece. I folded a blank page in four and started cutting curly figures, then I opened the page and this "design" was the result. Something as simple as that can make a pretty and interesting project. See? I told you it was it's easy.

This is one of my favorites, it's simple and colorful.

Here's another example, just mixed some colors, I used different stitches, some sequins and Voila! :)

I hope you liked this post. You can use it as inspiration, sketch something you like, cut the felt and start making your next project!!! :)

Enjoy!

Thanks for visiting!


Tuesday, June 8, 2010

Flowers, Flowers, Flowers...

Last year I started looking for simple, easy patterns, to practice my poor crocheting skills. I found that instead of trying to make blankets, cushions or any projects that usually takes months to finish, it was better to make little things that I could make quickly. First, I tried granny squares, but after a while I got bored (Not that I don't like granny squares) I wanted to make something else. I bought this book and they have the best pictures, and the easiest instructions. Then I also found amazing tutorials on YouTube and many more on dozens of blogs.


These are some of the flowers I've made, I would totally recommend for those of you who are learning, to try some flowers because you get to practice different stitches and techniques.


I love how they look, different textures, sizes, colors. The combinations, once again, are endless... :)


I'm working in some of my own patterns and they would be available soon on this blog. Stay tuned :)

Enjoy! and start crocheting your bouquets!!!

Thanks for visiting!

Monday, June 7, 2010

Heart Garland...

It doesn't have to be Valentine's Day so we can make any kind of hearts right? :) I found a super easy pattern online, I just added some details to make it more personal. You could use different colors, or maybe use one color, it's just a matter of coming up with little ideas that would fit your style. Mmmm... what about an all-white garland?? with sparkly white beads?? or pastel colors for a baby's room?? There are millions of ways to make each garland different... just be creative.

So, here it is... It has these two different sizes. The pattern for the heart is from here. I used two different yarns for each size, the pink is thicker than the red, so that the difference on the size could be more noticeable. Then I made the little red bows for the big heart and hung some beads on the red ones, this would add some sparkle and movement to the garland.


I'm sorry for the bad lighting it's been a really gloomy day today.


Again, there are millions of ways, combinations, yarns, colors, etc, to make any project, just make something that would make you feel proud when you look at it. Be creative, grab a cup of coffee and start putting together your new project. I promise it would look beautiful.

I really hope you liked this cute and easy project. I would love to see some of your own. Post a link or a picture so I can see them... Thanks for visiting!

Enjoy!

Saturday, June 5, 2010

Make Your Own Stitchy Art...


The owl pattern is done!!!... but, because I'm new at blogging, I'm not really sure if I can upload the PDF file on Blogger. For what I researched I can't :( I will be posting the file on jpg format. If there's any problem with it I will be happy to email the PDF file.


If you want to copy this image to your computer it's fine. But again, if you have any problem, comment bellow to see how can I help.

Ok now, you can use different colors, you can also use fabric or any other embellishment you like. It's really just the first step to start your piece, from here you're free to make whatever you like...

I hope you enjoy making this stitchy project, with no hurries and a hot cup of coffee by your side :)

Enjoy!!!