... a little crafty place...


Showing posts with label Crochet. Show all posts

Wednesday, November 24, 2010

More Crochet!!!

I'm making another pillow!!! I found the pattern here. I used different colors, but it still looks beautiful!!!...

Flower, flowers, flowers...


These is the size of my pillow...


It's almost done, I just have to make the back... but I'm not sure if I want to crochet it, or sew it... I haven't decided yet... For now, I'm going to finish my new stripe bag... See you soon!!!


Wednesday, November 17, 2010

Stripe Bags

Before I started blogging I read many many blogs. After reading blogs for months I decided to open my own. (I bet the same thing happened to some of you out there ^_^). One of the first blogs I read was Attic24. She crochets colorful and beautiful things!!!. If you visit, you'll see pictures of teacups, fireplaces, blankets, it's just very very cozy. Lucy, (that's her name) made a beautiful bag for her yarn, and so I made one for me from her pattern. This was some months ago... wanna take a look?


I added some flower to it. She also has the patterns for these little flowers.

Scalloped edge... It makes everything prettier (to me). :)

I'm working on my second bag. I'm using the three colors I can't get enough of... brown, blues, and greens... These time I'm using my own pattern, it's very similar. The only thing is that I'm not following hers, step by step... you know what I mean?... Here's what I have so far...


What do you think???!!!

I'll be showing you very soon the finish product ;)... Oh!!! and I'm planning to put many many flowers on this one...

Thanks for stopping by!!! ;)

Friday, August 27, 2010

Baby Rattle

For a few months I've been making amigurumi dolls. I said I wanted to come up with 15 patterns of my own. I've made the Jellygurumi, the Lady Frog and this Baby Rattle. I'm actually working on the 4th pattern which is a Dog. I can't wait to show you. This one is very very simple, I took several pictures while I was working on it ... Let's see...

These are the colors I picked.

I sewed the two together... I wanted the smaller circle to be off-centered.

Here's a sneak pick of the back or the inside of the rattle.

So, I needed a "device" to make the rattling sound. One of my migraine pills bottle was almost empty, and I remember that little annoying thing they put inside of it. (I say annoying because it gets in the way every time you're trying to take the pills out while your head is pounding) Horrible!!!. Anyway, I took the little plastic thing out, then the Silica beads and I had this perfect mini container for my beads.

Here it is!!! I'm gonna have to think of a better way to put the beads inside the rattle. :/

Then I started closing the circle while stuffing it, little by little...

Then I finished the stem and the leaves... yay!!! After I saw it finished I realized I could've used brighter colors, right?

Oh! by the way, this is a really quick project too... I'll be showing you my 4th project soon... I'm trying to come up with the pattern for the ears :) I want those to be long and big doggie ears. Stay tuned!!!

Chao!


Tuesday, August 24, 2010

Flower Pincushion

Those of you who've been reading my blog know that I love easy-quick projects. I always have big WIP's but I get bored easily with them. So, I'm always looking for fun projects to distract myself from tedious projects, well, not tedious just projects that take longer to finish... you know what I mean. Anyway, surfing through Ravelry I found this BEAUTIFUL pincushion. It took me probably 2-3 hours to complete, while watching a movie :) so, trust me it's a really quick project!!! I love it! so colorful and cute! Of course you can use any color and anything you want, to decorate the top... just fun!!!


What do you think???!!! You should try to make one... ;) You'll love it.

Enjoy!!!


Saturday, August 21, 2010

6 Petal Flower Tutorial

Hello readers!!! I'm so sorry I've been gone for so long. I've been soooooo busy you have no idea. I wanted to let you know that I'll be going on a little vacations to Venezuela (Yay!!!). I'll be gone for about a month, but don't worry!!! I'll be posting from there of course. I've prepared several posts, I just have to press "Publish Post" and you'll be able to see what I've got to show you. Stay tuned for fun tutorials and crocheting ideas. I'll also post some pictures to show you a little bit of my beautiful country.

Now, I've been wanting to post this tutorial for days!!!. It's a really cute flower, and the best thing is, that it's super easy. Let's get started then...

We'll be using the following stitches.

Slip Knot. You can watch my video here if you're not sure how to make one.

Sl St (Slip Stitch). Insert hook, yarn over, pull the loop back through the stitch, then through the loop on your hook.

Dc (Double Crochet). Learn how to make dc here.

Tr (Treble or Triple Stitch). It's the same as dc but this time you yarn over twice on your hook before going through the stitch and then pull through two, 3 times. I'll show some pictures.

First, make a Slip Knot.

Then, ch. 3

Now, make 1 dc on the first chain, or the 3rd chain from your hook. It counts as the 1st stitch.

Dc 12 around on the same chain. It would get a little tight (but that's the idea) ;)

When you're done you should have 13 stitches. Make a Sl st on the 3rd chain of the 1st chain.

Join the second color, and ch.3 (counts as the 1st st.)

Make a knot in the back to secure both yarns.

Make 2 tr on the next stitch.

Now, make 1 tr on the next stitch. Then ch 3.

Make a sc on the base of the last tr. Ch 3 to start the next petal.

Repeat these steps 5 more times.

Sl st at the base of the 1st ch. and make a knot.

Now, hide the yarn on the back of the flower. Pull it through the back stitches several times and then bind off.

Make any color combination!!! It's super easy.

Ok, I'll repeat the petal steps just in case you get a little confused, here it is:

After you've changed colors, **ch3
then 2 tr on the next stitch.
1 tr on the next stitch, ch3
sc on the next stitch, ch3**

Repeat from ** to ** 5 times.

I hope it is clear enough. I mean, it makes sense to me because I wrote it, but PLEASE don't hesitate to make questions, I'll be glad to help you.

Enjoy these pretty flowers!!!

Ciao, Ciao


Thursday, August 12, 2010

It's finished!!!

The dress for Lady Frog is ready!!! Yes, I finished it yesterday, it looks cute on her :). There's one thing though, I think I could've used a thinner yarn and a smaller hook for the dress, that way the stitches would be smaller than the ones on her body... *whispering* but no one has to know ;) I'm sure this is just the first of many dresses I want to make for Lady Frog. Since I started "knitting" I might knit a dress for her... what do you think??? :) Or maybe sew little pants and shirt? believe me it would not be the last dress I make for her. I'm just so proud of my own pattern :) Here it is!!!


So, about the name for "Lady Frog", I was thinking about "Lola" I think it's girly ^_^ It's no definite, if you have any suggestions let me know :) This is it for now... Thanks for stopping by

Chao ;)

Tuesday, August 10, 2010

Lady Frog's Dress Sneak Peak...

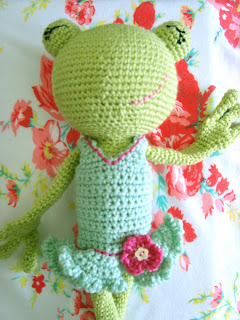
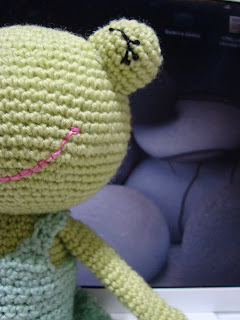
So, I made a dress for Lady Frog during the weekend. I'm still working on the last details but I couldn't wait to show you a little bit of what I have so far. It's gonna be super girly of course ^_^ ... I crochet the dress, but now that I'm "knitting" (If you can call that real knitting) I think I want to try to knit a little dress for her, I think it would give it an interesting detail, don't you think? I still have to make some flowers for her, and maybe some other dresses... It could be fun to have several dresses to play dress up with, wouldn't it?. I feel like I'm going back 20 years, although I didn't play with dolls much, I have 3 brothers so I was playing with mud, climbing trees or playing baseball, but I definitely had some dolls and played as any other girl (when me and my brothers were mad at each other hehe) Anyway, I love making these dolls.... Let's see the pics


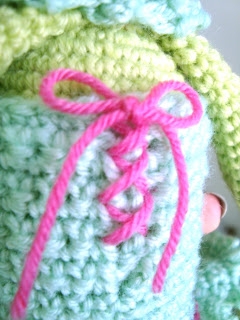
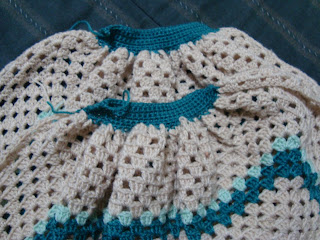
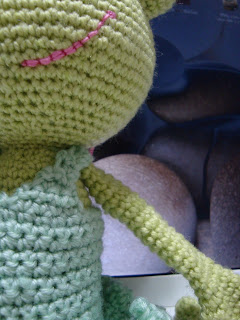
It's a halter dress, I was going to crochet the arm holes to the back of the dress, but her hands are so big that it was a little hard to put them through. (I can't show you the back yet, it's not finished) :\


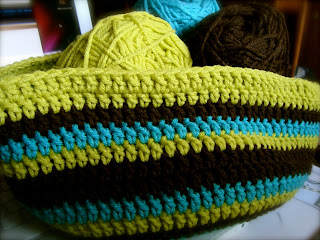
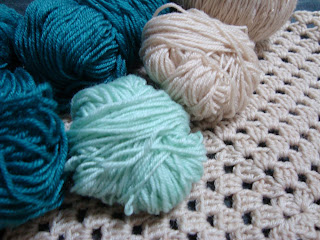
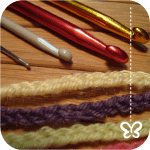
The only thing that bothers me, is the yarn, it's too thick. I think that a thinner yarn would look more delicate... we'll see how it looks at the end when it's completely finished.


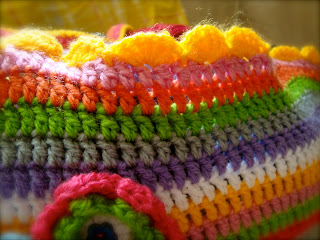
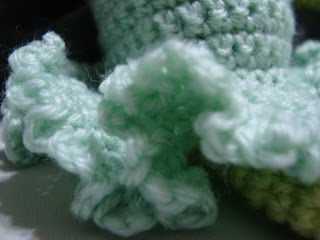
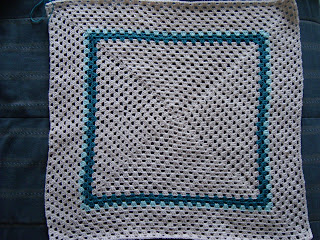
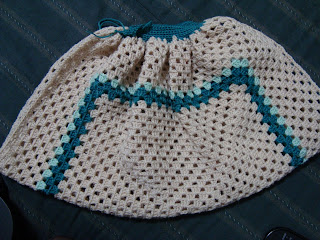
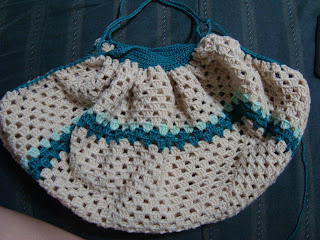
How about this cute ruffled skirt??? cute huh?

Ok, this is what I have so far. After I finish writing this post I'll be working on Lady Frog's dress... I'll post some pictures after I'm done, stay tuned!!!

Ciao, Ciao!!!
Thanks for stopping by ;)

Wednesday, July 21, 2010

WIP sneak peek

Wow!!! It has been almost a week since I wrote my last post. Here I am again!!! with a new project... yes, another amigurumi pattern... I'm so excited about it. I want to show you some pictures of what I have so far... but! I'm not gonna let you see what it is ^_^. It's a surprise!!! although I think you'll be able to tell anyway... This is the third pattern of 15 I'm planning to make. So far this is the biggest amigurumi I've made, I think It will measure about 18" when it's totally finished... Let's see the pics then.


I think this picture reveals the "secret" :)


Thursday, July 15, 2010

My very first Amigurumi pattern

I've been working on my new obsession, amigurumis!!!. For the past few days I've been sketching, taking pictures and drawing several amigurumi characters. I've been making amigurumis for more than a year now, and I got to the point where I feel confident to design my own patterns. It took me a little while to understand the little math involved in making these pretty things, but what's a "little math" for some people, to me it's "days of hard work and concentration" mixed with desperation-tears and a lot of hair-pulling nights (hehe). Really, math it's just not in my genes. Anyway, I have about 16 characters in line waiting to be crocheted. I decided to start with the easiest one, very basic shapes. Its name is Jellygurumi, don't you love it? Imagine the infinite combinations you can use to make this little toy. It's about 8 inches tall and 4 inches wide.


I'm very happy with the results, I can't wait to make the next one.

I'll be posting the "behind the scenes" of Jellygurumi. Stay tuned!!!

Thanks for stopping by!!! ;)

Wednesday, July 14, 2010

Crochet tutorial (Double Crochet)

Hello again!!! here's the third tutorial. You'll learn how to make the double crochet stitch... Now, let me explain a few things before you start watching the video. I started the double crochet (dc) row on top of a sc row. If your pattern starts with a chain and then double crochet, you'll have to make the foundation row and then 3 more chains, in this case you'll make the 1st dc on the fourth (4th) chain from the hook. For example, the pattern starts like this: Chain 25. You chain 25 plus 3 more with a total of 28 ch. (which represents the first dc of the first row). I really hope this makes sense :\ Here's the video to make it a little easier... (oh! I edited part of the video in slow motion, so you'll be able to see better every step.)

Here it is!!!


Enjoy!!! ^_^

Sunday, July 11, 2010

Granny Square Purse - Update?

I don't really have good news today :\ ... Remember my WIP Granny Square Purse? I've been showing you the "making of" here and here. Well, yesterday I worked on it during the AMAZING but dirty WC game. After the game, it was time for me to start making the handles. Ok, I started crocheting them stitch after stitch. It was when I was crocheting the last two handles that I realized that... I didn't like the purse anymore. I had mixed some colors in the middle, I thought a pretty line of bluish-greens would look nice across the purse and that it would add an interesting detail... Well, my "interesting detail" became an "EWW detail" to me... I hated it!!! It looked so... ugly!!! So I decided to undo it :\ just to take the color yarn OUT!... So this time is just going to be a beige bag... solid beige no "interesting detail" on it...


Here I had finished the mega-granny square...


Here's one handle ready!!!


Two handles ready!!! I thought... Yay!!! I'll be done soon!!! :\ I guess I was wrong, but you know what? I rather undo it and make something I LOVE! than to make something I would never wear or use... right?


You can see it's starting to take shape...


... and here, I stopped and said... I don't like it!!?!!?!!
But do you like the shape? I think it would turn out pretty :)


Here's how it looks now... a lot of rows smaller...


So I learned from this experience that it's better to take a little more time in making something you'll adore at the end, than something that would end up stored in some closet or drawer until you'll get rid of it... It would be a waste of time and yarn, don't you think?